การออกแบบของเราจะพัฒนาให้มีการถามตอบ ให้มันคุยกันนั้นเอง เพื่อให้ได้ข้อมูลที่ถูกต้องครับ
- Nodemcu : ฉันถามเธอ (ตัวแปรที่ 1 คือค่าอะไรส่งค่ามาน่ะ) ถ้าเธอไม่ตอบฉันจะถามเธอซ้ำๆ จนกว่าเธอจะตอบ
- Arduino : ส่งตัวแปรให้ Nodemcu
พี่จะยกตัวอย่าง การส่งค่าแบบค่าตายตัว ให้น้องได้ไปพัฒนากันต่อน่ะครับ
ตัวอย่างการต่อวงจร

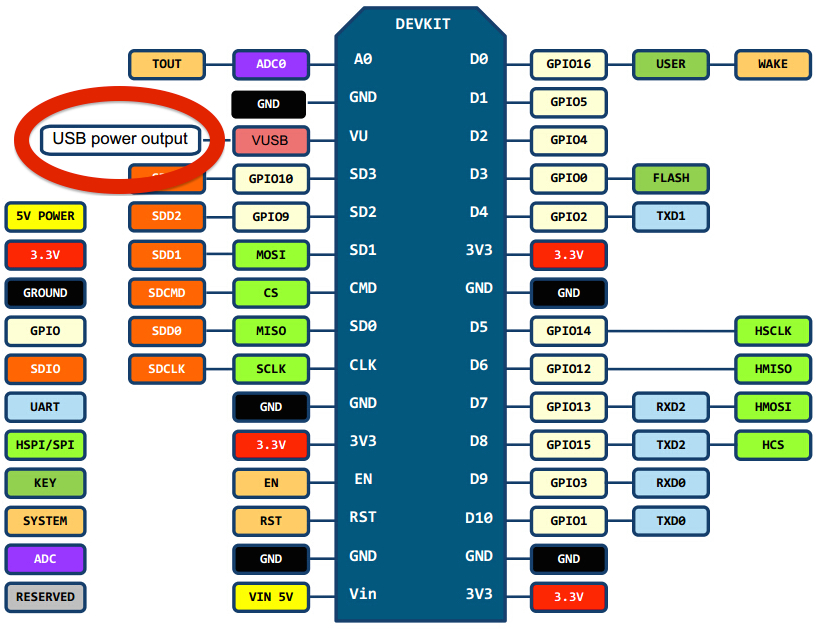
| Arduino | Nodemcu Esp8266 |
| Pin 10 | Pin D6 |
| Pin 11 | Pin D5 |
หากต้องการสื่อสาร ระหว่าง uno กับ nodemcu ด้วย serial
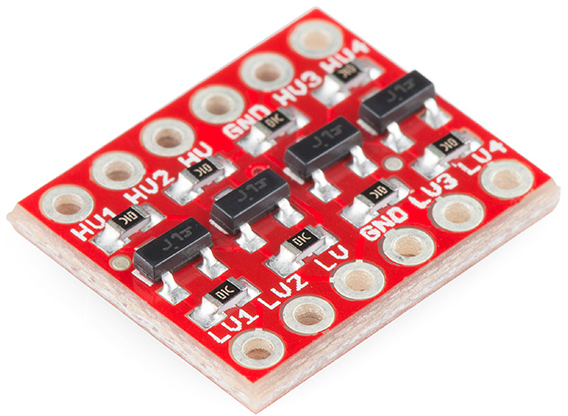
การต่อ tx , rx จาก uno ไป node mcu ต้องต่อผ่าน Logic Level Converter ก่อนครับ
เพราะ tx , rx ของ uno ทำงานที่ 5v แต่ nocd MCU tx,rx ทำงานที่ 3.3v
UNO NodeMcu
Tx – Logic level convert –> rx
rx <— — tx